Home and ramp checks

Easy launching starts with courtesy at the ramp

Courtesy should be shown when launching your boat. 

When a facility is busy skippers can feel pressured to launch their vessels quickly and for the less experienced boater it can be a stressful time.

Before a skipper even gets to the ramp there are a number of steps to be taken beginning at home with a BEST check.

Experienced and new skippers can improve their ramp experience by taking the following steps.
 

One: BEST check at home

To be completed before you reach the boat ramp, this will eliminate possible issues and prevent unnecessary delays at the ramp.

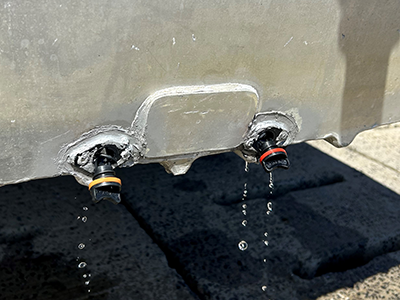
B – Boat: Check vital elements including batteries, fuel (cater for 50 per cent in reserve) and oil, steering is free, keys are onboard, bungs are in place, and ask yourself the question: is your boat suitable for the area of operation? 

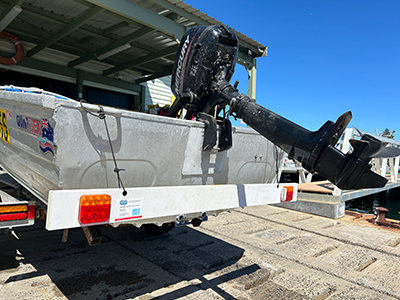
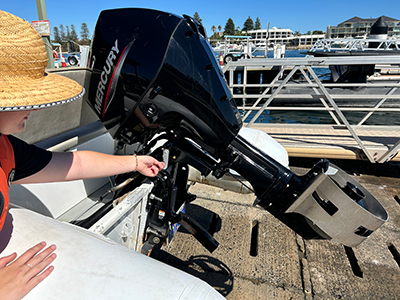
E – Equipment: Test run the motor to determine that it will turn over; assess that the trailing bracket is operational and use it to rest the motor in place during transit to the ramp. Make sure that all the equipment you require for your voyage is onboard, working, and secured.

S – Safety: Do you have the correct safety equipment for the area you intend to operate in? Inspect each item to see if each is in-date and operable. Check the boating weather forecast suitability for your vessel, passengers, and your level of experience, and finally, ‘log on’. This step may be done as a float plan with a responsible shore-based person or via Marine Rescue once on the water.

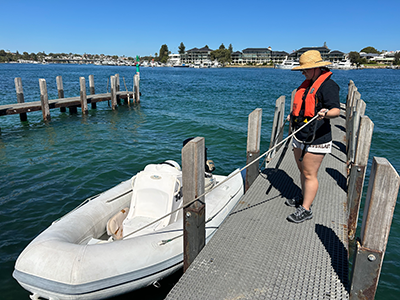
T – Trailer: Working lights, tyre pressures and bearings, tow hitch and safety chains, and tie downs should be checked prior to departure and more frequently as part of your normal maintenance schedule. Check that the painter (rope at the front of the boat holding it to the draw bar of the trailer) is secure from the vessel’s bow connecting to the trailer.

Two: Preparation

Before you reach the turn around area at the ramp prepare your vessel by following the rule of POWER.

P - Painter rope needs to be disconnected for use as a launching bridle. A launching bridle is a rope that is attached to the bow and stern of the boat with enough length to be taken by a helper along the finger jetty alongside the ramp during launching. The bridle allows better control of the boat in the water. Purchase parking if required.

Painter rope needs to be disconnected for use as a launching bridle.

O – Off lights which reminds the skipper to remove the light bar from the trailer if it can be disconnected. Even for light bars said to be waterproof it is still worth the effort removing them as it removes the risk of flickering globes later. If the light bar is not removable, pull out the connection to the car. This rules out a short in the circuit due to water on the wiring which can be transferred to the car and affect the onboard computer system proving very costly.

Offlights which remind the skipper to remove the light bar from the trailer or disconnect if the light bar is not removable.

W - Wind and tide need to be noted. You should take a few seconds to look at the prevailing wind and tidal current at the ramp’s waterline. As soon as the boat is free from the trailer it will move with the wind and tide. Be aware of other boats and obstacles downwind and in tide direction. Use the ramp that will allow the boat to be blown towards the jetty.

E – Engine tilt. You should ensure the engine is up and off the travelling bracket (the bar under the leg of the engine which supports it during towing). This will stop the engine from hitting the ramp on launch and have it ready for lowering once in the water.

A skipper ensuring the engine is up and off the travelling bracket.

R – Replace the bung. There are two types of boat owners: skippers who have left the bung out of the boat; and, skippers yet to leave the bung out of the boat. Apart from being red faced, it will take some manoeuvring to retrieve a half-sunk boat back onto the trailer to drain.

Replace the bung in your boat before launch

Replace the bung in your boat before launch

A final tip for preparing for launching is to have everything on board that’s needed for the day out. It is difficult to load coolers, rods, clothes, and other equipment from a thin finger jetty with other boats about and the process is time consuming.

Three: Reversing

Reversing is an easy exercise when practised. Some handy hints:

  • Hold the bottom of the steering wheel and push it the way you want the back of the trailer to go.
  • Have a helper walk down beside the driver door facing towards the trailer to provide feedback on the direction to go. This is especially helpful when the boat disappears over the downward slope of the ramp. 
  • Turn the radio off.
     

Four: Launching

When the trailer enters the water a good rule of thumb is to have the wheels half submerged (up to the centre hub). This will depend on the angle of the ramp and the length of the draw bar.  Having the trailer underwater is not necessary and will impede launching. 

Tips for the final stage of launching:

  • Be careful of the ramp as it could be very slippery.
  • Take things slowly. 
  • Check the helper is holding the bridle and the area behind the boat is free.
  • Unclip the safety chain and catch strap – doing these earlier risks the boat rolling off the trailer early.
  • Take a firm footing and push the bow upward and backwards. If the trailer skids have been set properly the boat should roll off easily.
  • Have the helper take the boat to the very end of the finger jetty and secure it while you park the car and trailer. This will allow the next boat to be launched quickly.

These simple steps will make launching a vessel less stressful and give you and others more time to enjoy being out on the water. 
 

Page last updated: Thu Jun 27 2024 12:27:13 PM